
 |
 |
|
|
|
|
 11-11-2010, 02:36 AM
|
#1 | |
  
|
Quote:
|
|

|

|
|
11-11-2010, 02:36 PM
|
#2 |

Drives: Yaris 4 Door Sedan Join Date: Dec 2008
Location: South Texas
Posts: 805
 |
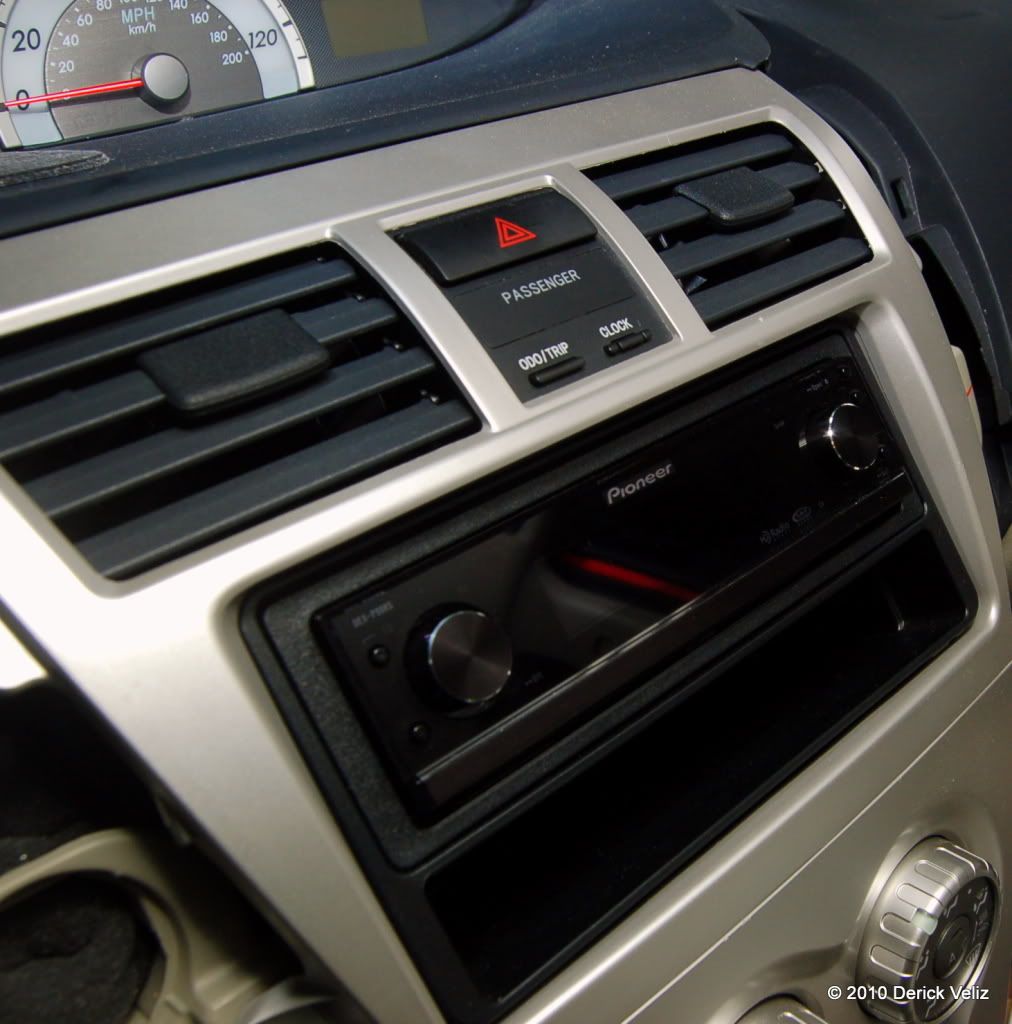
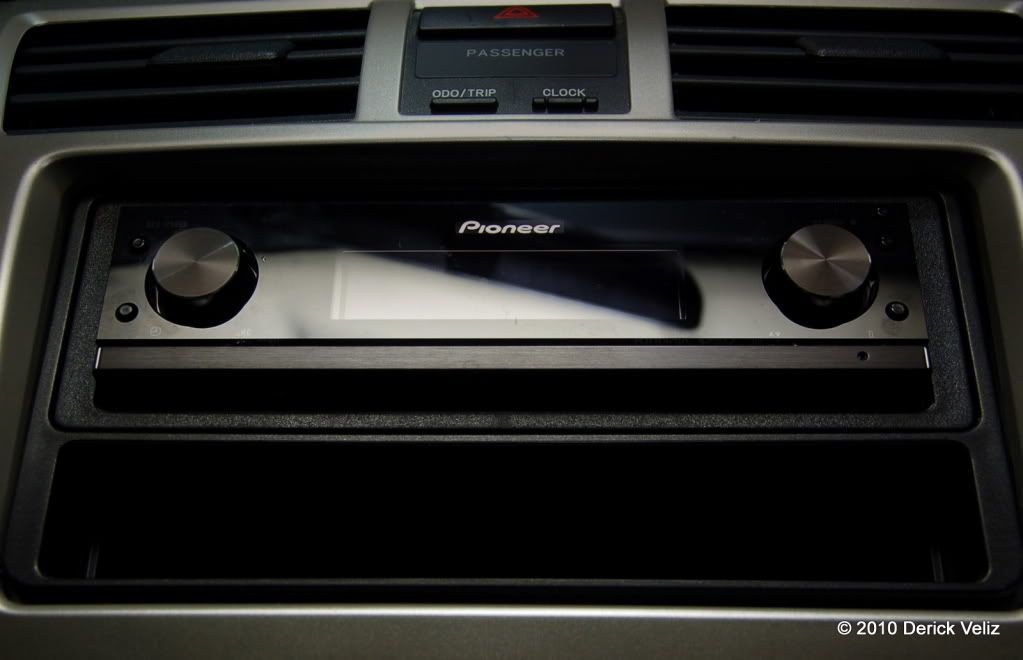
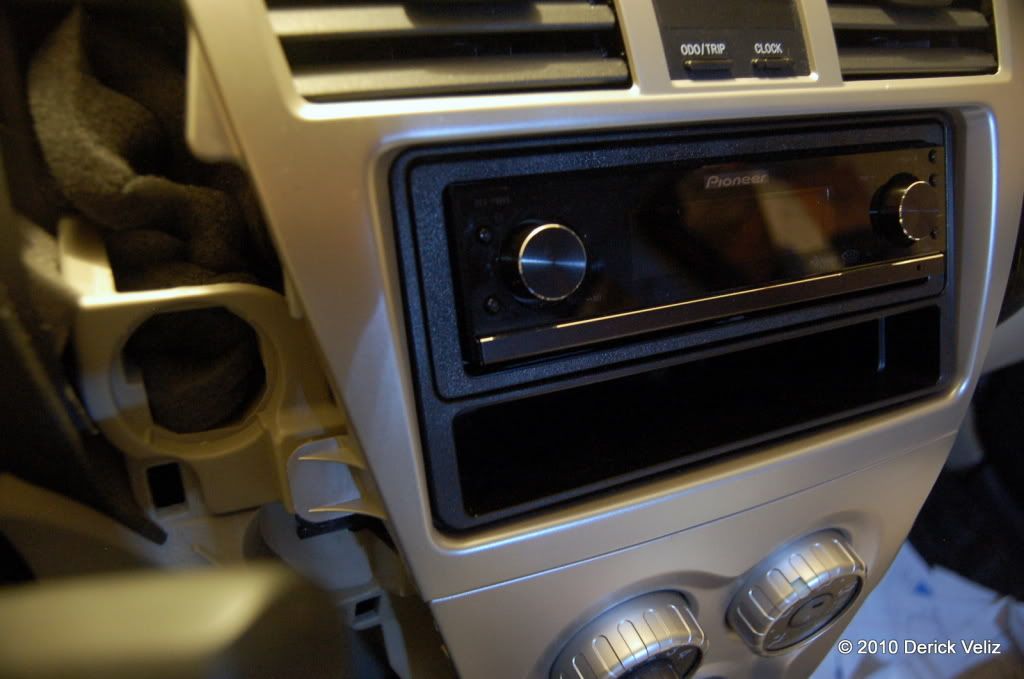
My Metra kit does not look that clean, i have gaps at the top and bottom, I'm going to order that kit, i've been looking for the Scosche kit around town but everywhere i've been has to order it.
Them components look sexy as hell btw  If you don't mind me asking what was the price on something that sweet ? If you don't mind me asking what was the price on something that sweet ?
__________________
  Audio is under Construction Kenwood KDC-X794 Hifonics Zeus ZXI6.5C 6.5-Inch 2-Way Component Speaker System - AUTOTEK ATX65CX 6.5-Inch Hifonics BXi 1210D - Crunch PowerZone P1400.4 (2)12 inch Kicker CVR's - 0 gauge from battery to Distribution block - 4 Gauge Power/Grounds to amps - Duralast Yellow Top - Big 3 |
|
|
|
|
11-11-2010, 02:46 PM
|
#3 | |
|
|
Quote:
D. 
|
|
|
|
|
|
11-11-2010, 04:37 PM
|
#4 |
|
Drives: Yaris 4 Door Sedan Join Date: Dec 2008
Location: South Texas
Posts: 805
|
Hey Derick did you have to do anything special to power the antenna ? On my first Headunit i had no issue, with the JVC the reception was poor, How is your reception ?
P.s I also emailed the guys at Metra earlier as well, they want better pictures of the gap on my Install kit, Maybe i can drive down there and perhaps get one that fits more snuggly. We'll see where this leads.
__________________
Audio is under Construction Kenwood KDC-X794 Hifonics Zeus ZXI6.5C 6.5-Inch 2-Way Component Speaker System - AUTOTEK ATX65CX 6.5-Inch Hifonics BXi 1210D - Crunch PowerZone P1400.4 (2)12 inch Kicker CVR's - 0 gauge from battery to Distribution block - 4 Gauge Power/Grounds to amps - Duralast Yellow Top - Big 3 Last edited by _S7V7N_; 11-11-2010 at 07:53 PM. |
|
|
|
|
11-11-2010, 12:19 AM
|
#5 |
|
Roadrunner Jr.

|
Did you join IASCA or did you just download it?
__________________
To argue with a person who has renounced the use of reason is like administering medicine to the dead. ― Thomas Paine |
|
|
|
|
11-11-2010, 12:40 AM
|
#6 |
|
Drives: Yaris 4 Door Sedan Join Date: Dec 2008
Location: South Texas
Posts: 805
|
Thanks for the quick Response Derick i appreciate it, Now another question, I'm going to load the songs onto my ipod through itunes and use the Sound Check option to even out the tracks, is this a good idea ? Or should i just throw them on a cd the same way i received them. I know the best thing to do would be to purchase the IASCA Cd, But what would be the next best thing ?
__________________
Audio is under Construction Kenwood KDC-X794 Hifonics Zeus ZXI6.5C 6.5-Inch 2-Way Component Speaker System - AUTOTEK ATX65CX 6.5-Inch Hifonics BXi 1210D - Crunch PowerZone P1400.4 (2)12 inch Kicker CVR's - 0 gauge from battery to Distribution block - 4 Gauge Power/Grounds to amps - Duralast Yellow Top - Big 3 |
|
|
|
|
11-11-2010, 02:09 AM
|
#7 | |
|
|
Quote:
D. 
|
|
|
|
|
|
11-11-2010, 02:06 AM
|
#8 | |
|
|
Quote:
D. 
|
|
|
|
|
|
11-11-2010, 02:02 AM
|
#9 |
|
I ain't even mad

Drives: 2010 1E7 Toyota Yaris Sedan Join Date: Sep 2010
Location: Prince George, BC. Canada
Posts: 954
 |
Record a vid with the souund :)
__________________
 |
|
|
|
|
11-11-2010, 02:31 AM
|
#10 |
|
|
.
 We are very happy to present our new family member... we welcome HAT L1v2 to the Veliz's TEAM... 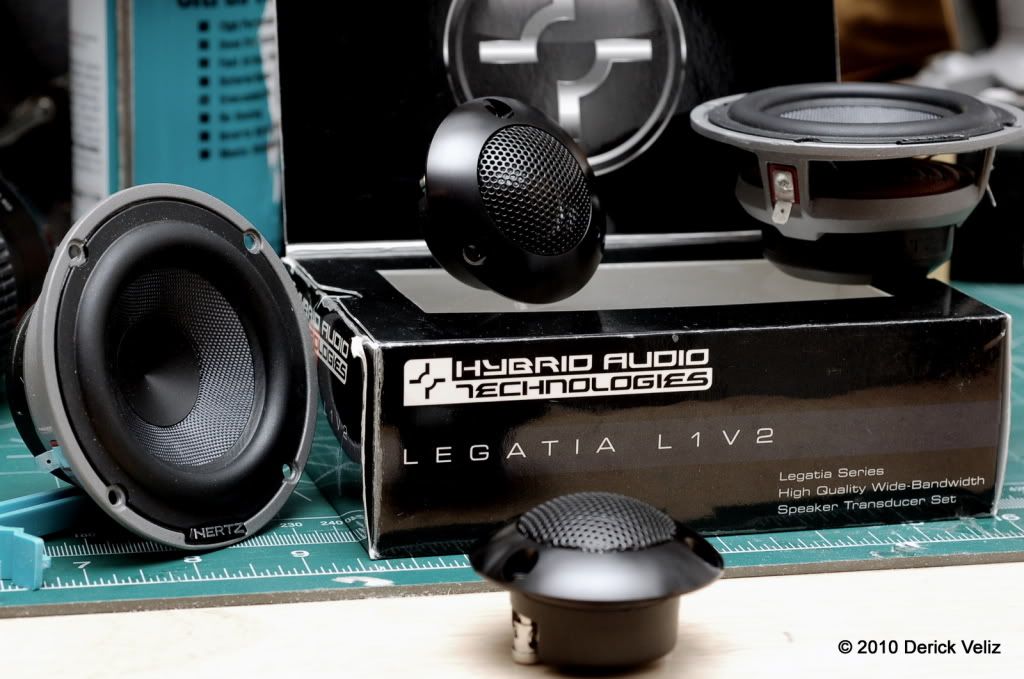  mmm the L1v2 are begging for spheres 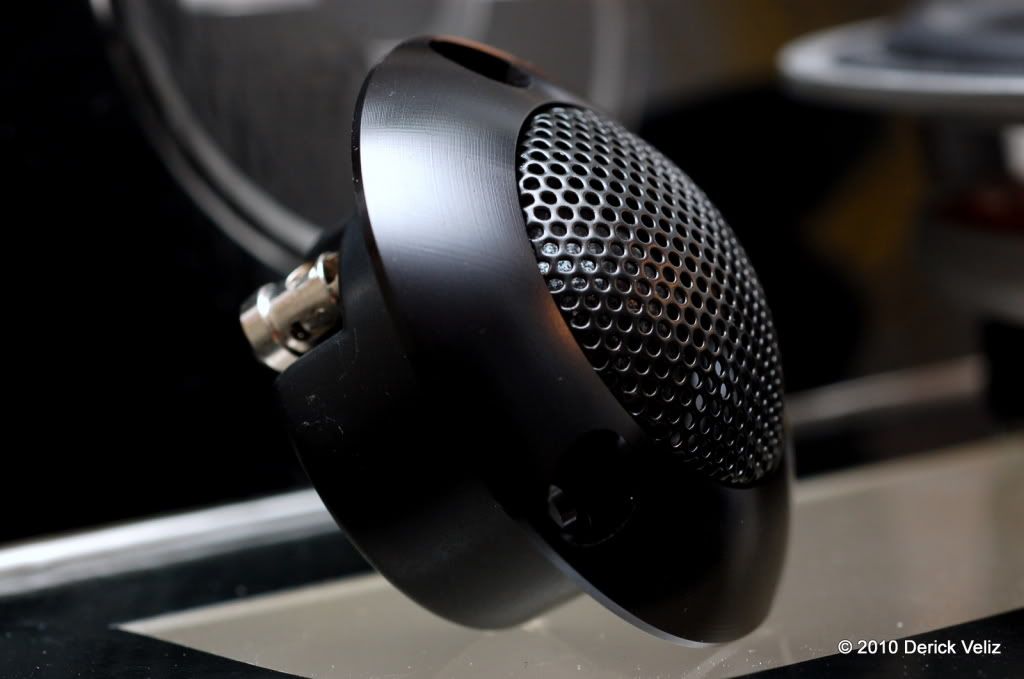 D. |
|
|
|
|
11-11-2010, 10:05 PM
|
#11 |
|
Roadrunner Jr.
|
You saw my dash setup. I used the same kit as Derick. I also gave you guys the solution on how to make things more snug.
Your antenna wire should be on the right side a-pillar. It's in a HUGE molex plug that you can eliminate and solder the ends together. I did it with mine to gain the space...for obvious reasons.
__________________
To argue with a person who has renounced the use of reason is like administering medicine to the dead. ― Thomas Paine |
|
|
|
|
11-11-2010, 10:21 PM
|
#12 |
|
Drives: Yaris 4 Door Sedan Join Date: Dec 2008
Location: South Texas
Posts: 805
|
I'm talking about on the wire harness where your connect the radio, And yes you did give us a detailed how to on the glass work on your dash kit, Very complex, if i get moved back down to Tx i will def go that route, but for right now, i lack the tools.
Okay i can't take it no more i'm on my way to walmart to get some connectors , heat shrink , and some electrical tape, ohh and a portable light. This cd player is gonna get close to finished tonite, and the nite is young , only 10:30 and i'm off again tomorrow !!
__________________
Audio is under Construction Kenwood KDC-X794 Hifonics Zeus ZXI6.5C 6.5-Inch 2-Way Component Speaker System - AUTOTEK ATX65CX 6.5-Inch Hifonics BXi 1210D - Crunch PowerZone P1400.4 (2)12 inch Kicker CVR's - 0 gauge from battery to Distribution block - 4 Gauge Power/Grounds to amps - Duralast Yellow Top - Big 3 Last edited by _S7V7N_; 11-11-2010 at 10:33 PM. |
|
|
|
|
11-12-2010, 10:05 AM
|
#13 |
|
Roadrunner Jr.
|
 ^You WILL sand more on the A-pillars...or else! Speaking of...where are the latest pics of those spheres?
__________________
To argue with a person who has renounced the use of reason is like administering medicine to the dead. ― Thomas Paine |
|
|
|
|
11-13-2010, 02:07 AM
|
#14 | |
|
|
Quote:
too much dust for the camera  D. |
|
|
|
|
|
11-15-2010, 02:07 AM
|
#15 |
|
|
Not a lot of progress this weekend, my sons birthday and many other things going on, but here we are after 4 or 5 sanding sessions...
Also in the background started to fill in the gap between the a-pillar and sphere, got some "thread-serts" too (for the speakers.)  D. |
|
|
|
|
11-15-2010, 02:36 AM
|
#16 |
|
Roadrunner Jr.
|
mmm...
Perhaps I should have bought the thread serts that use the allen wrench to insert them for you...
__________________
To argue with a person who has renounced the use of reason is like administering medicine to the dead. ― Thomas Paine |
|
|
|
|
11-15-2010, 12:31 PM
|
#17 |
|
|
*
How do I cover the a-pillar with speaker grill cloth or any other cloth?  do I use spray 77 before all over the a-pillar? or just behind where it bends? Thanks D. |
|
|
|
|
11-16-2010, 02:45 AM
|
#18 |
|
Roadrunner Jr.
|
Negative ghost rider...
attach the cloth to the back. What you're doing shouldn't be covered by grill cloth IMHO. It should be painted. I say that we should look at it when we actually get there. In the mean time, how are the spheres looking?
__________________
To argue with a person who has renounced the use of reason is like administering medicine to the dead. ― Thomas Paine |
|
|
|
 |
|
|
 Similar Threads
|
||||
| Thread | Thread Starter | Forum | Replies | Last Post |
| sound deadening: sq footage amount for 3dr | goku87 | In Car Entertainment + Electronics (audio / video / alarm) | 29 | 11-14-2013 12:37 PM |
| 2007 Yaris S Sound Deadening | sqcomp | In Car Entertainment + Electronics (audio / video / alarm) | 70 | 12-13-2010 07:40 PM |
| Sound deadening | 06vitzRS | General Yaris / Vitz Discussion | 10 | 05-05-2010 01:51 PM |
| Sedan Door Panel Deadening | sqcomp | In Car Entertainment + Electronics (audio / video / alarm) | 42 | 06-01-2009 02:47 PM |


 Hybrid Mode
