
 |
 |
|
|
 11-22-2009, 07:33 PM
|
#1 |
|
Give Me Resonance

|
Well I've gotten tired of how the 'ol Depot Projectors are looking so I've started the project and gotten pretty far in one day.
I will also be adding the super legitimate audi style side emitting flexible LED strip. My main gripes are as follows - The clearcoat layer is peeling away and looks like crap - The Halo's are dim and yellow and effectively pointless - Moisture would clearly get inside and...well that sucks - I wanted to clean up and hide the wiring Pro's are - The angel eye led's are still performing well - With an HID kit the projectors put out a good amount of light with a nice cutoff - They look sweet when they are in good condition. Process: I went out and got a few things to make this all possible and I also ordered a few things online. This is the laundry list: - Ribbon Sealer from an Auto Parts Store (to seal EVERY SINGLE HOLE) - 1500 and 2000 grit sandpaper - A dedicated Headlight polisher/wax - 6 Hyperflux Blue LED's & 6 3MM Super Bright Standard LED's from Oznium (just to be sure of fitment) - Assload of zip ties if you want to be organized - Basic Tools I have so far gotten the headlights apart into their 3 respective pieces. To do this I removed the smallest and probably rusted for you too screw there is near the top of the housing underneath. Remove the entire stalk of cables and the bulbs...remove it all...everything..good. I then took the biggest cookie tray i could fit in my oven and covered in it a wet wash cloth and put it in the over at 275 degrees for 3-5 minutes...I would say 4 minutes. The washcloth will also introduce moisture into the oven so as to keep things from truly burning. Once i removed the headlight(s) i then took a flat head screw driver and started to go around the ENTIRE perimeter and separate the housing from the lens. Be very careful and take your time, the glue wont harden all that fast but once you see them starting clearly separate just pull it apart with both hands slowly. You will then have 2 parts, with the part that has the lens and the other thing there are two small phillips head screw somewhere along the edge, find them and remove them and then remove the piece from inside the lens, you now have 3 pieces. This is as far as I have gotten and I am waiting to receive my LED's and ill starting polishing the lenses tomorrow. PICS 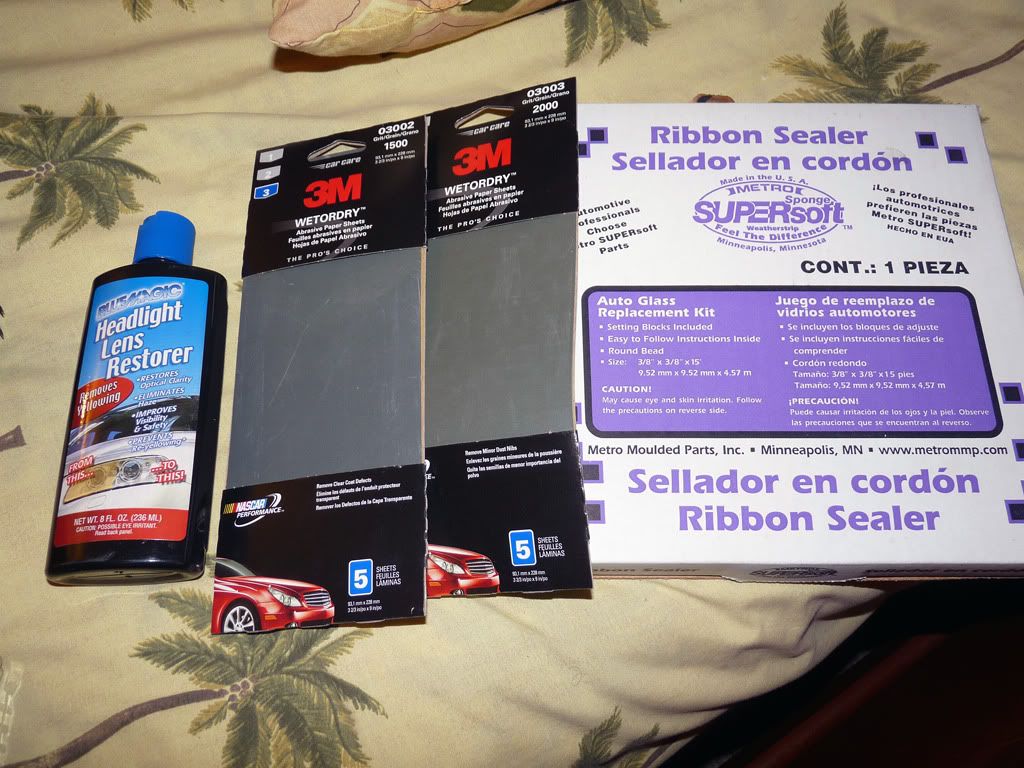 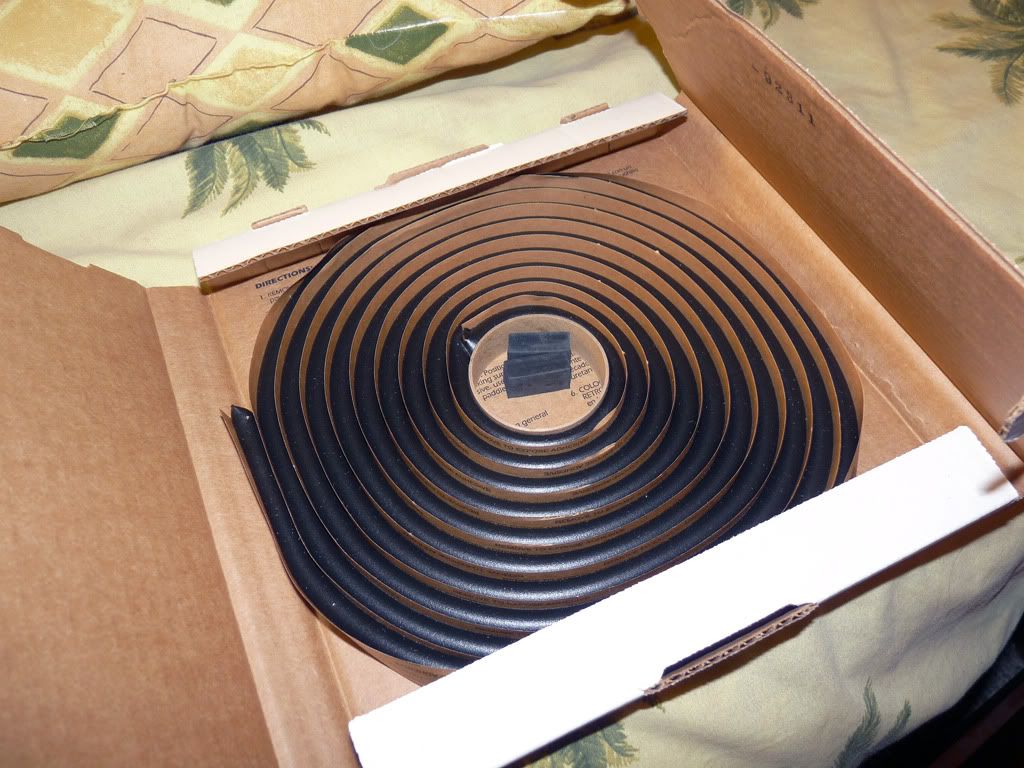 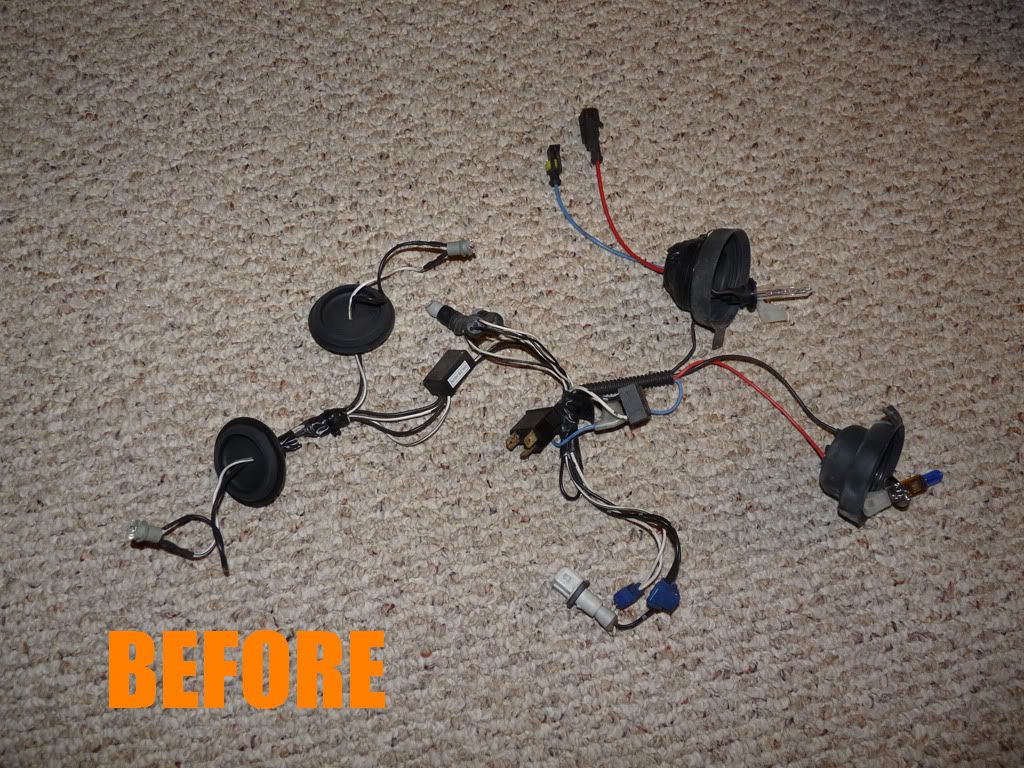 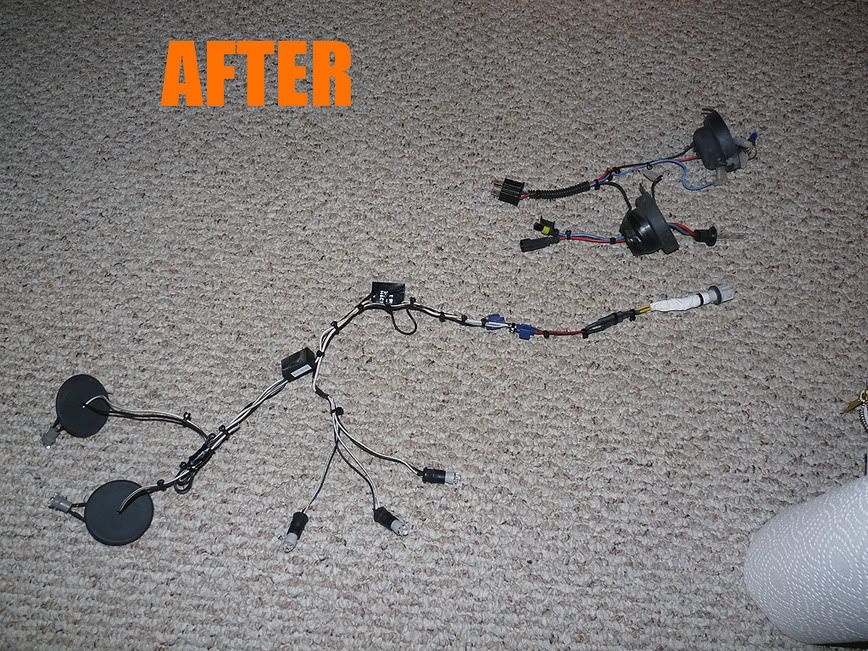 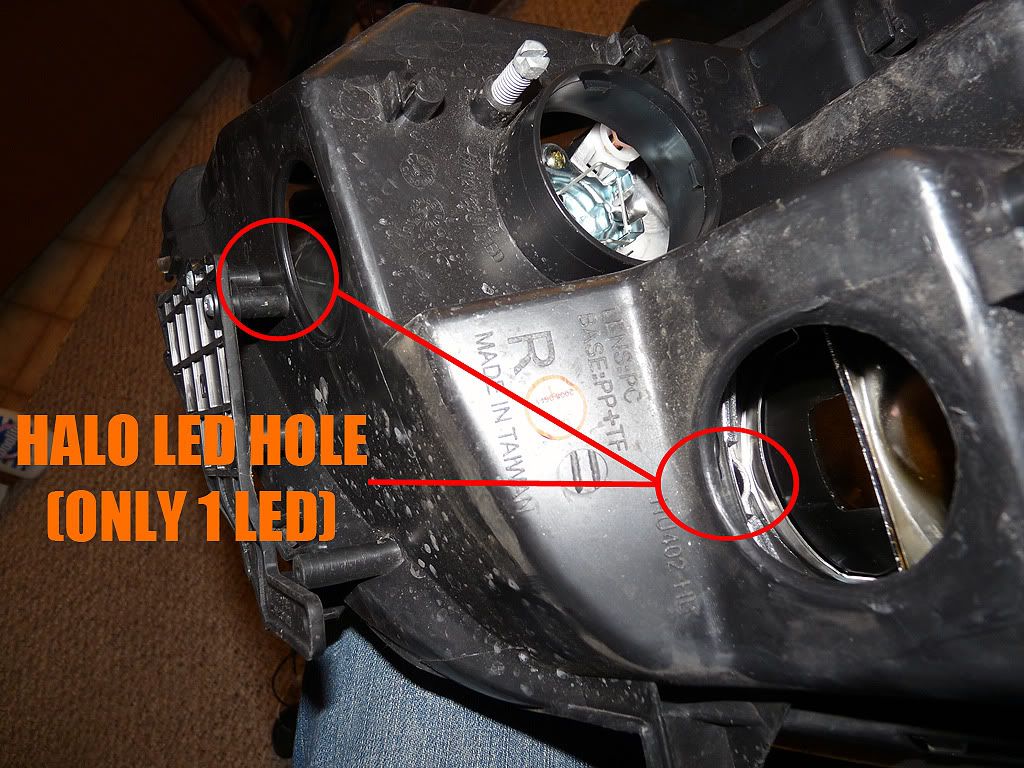 MY LED Flashlight is brighter than what came with it and Im just holding it sorta in the opening.... 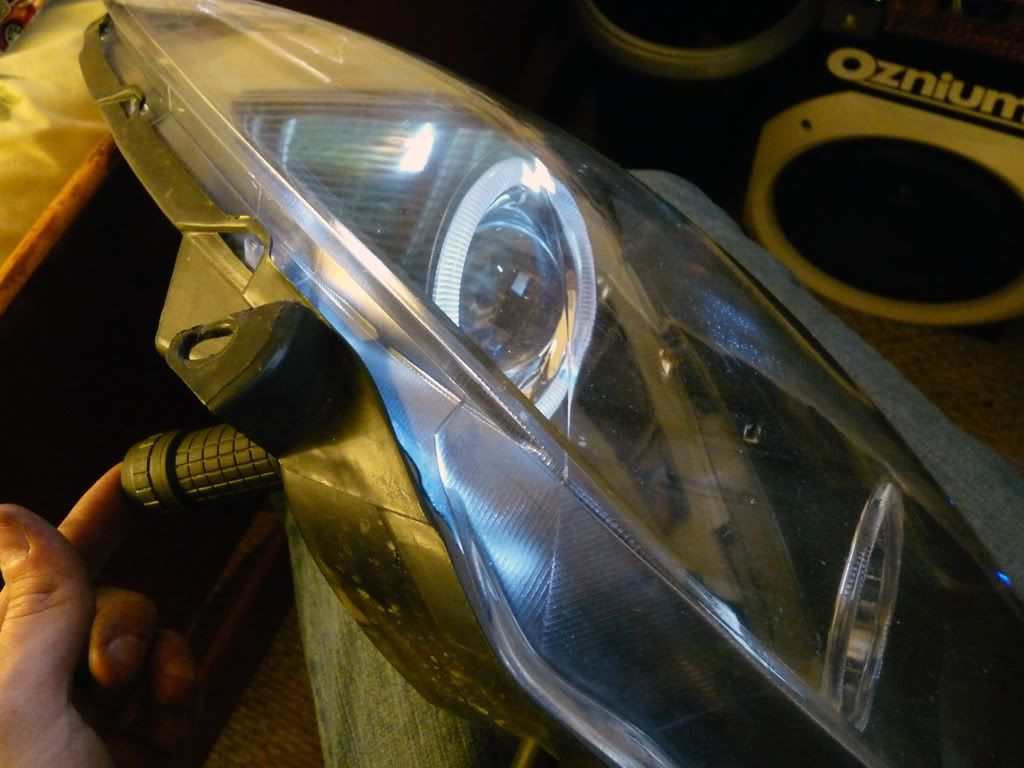 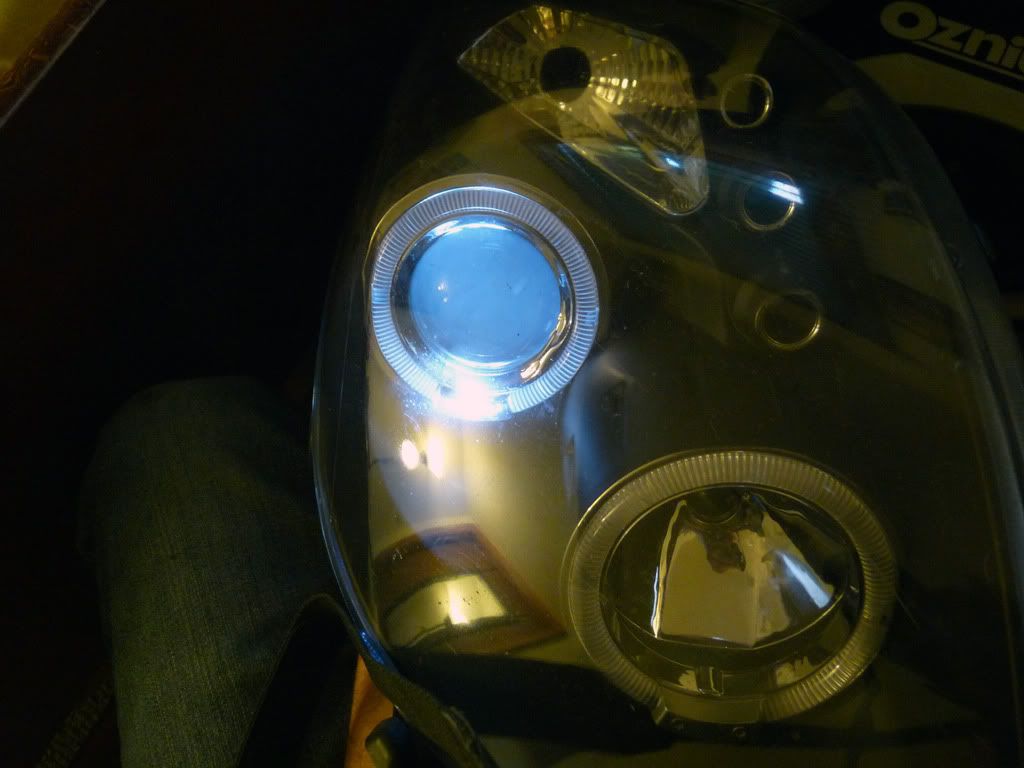
__________________
 (3) 12" Alpine Type R Subs/Hifonics BXi1208D Hifonics ZXi6.5c / 2006 Kicker ZX350.4 Knu Fleks 1/0 Wiring & In Big 3 Optima Yellow Top Battery/Iraggi HO Alternator Alpine CDA-105, KCA-420i/KCA-121b/KCE-400BT PG TLD22 8V Line Driver |

|

|
|
11-22-2009, 07:39 PM
|
#2 |
  
Drives: 2008 Toyota Yaris Liftback Join Date: Oct 2008
Location: Houston, TX
Posts: 1,054
 |
Cool!! can't wait to see the finished project! good luck!!!
__________________
C-Lift  -------------------------------------------------------------- Current Mods: MI Armrest; Full LED conversion (interior and exterior); RS spoiler; Tinted windows; Tanabe DF210 lowering springs; aftermarket door speakers; 12" RF P3 subwoofer with custom box wrapped in Neffy; seat covers; HID 8000K headlights; HID 3000K foglights; 13mm PG hub spacers; muffler delete with dual tip; eyelids; and.. A little red Domo mascot! 
|
|
|
|
|
11-25-2009, 06:16 PM
|
#3 |
|
Give Me Resonance
|
Step 2: LED Swap & Additions So I got my LED's from oznium today which was very fast and im pretty excited. Each halo will be getting a hyperflux blue LED at the oem hole and I will be drilling an extra hole directly below it at the other end of the halo for a 3mm blue led so that the circle of light is completed with little gradation. I will be using a dremel tool with a 3mm bit to drill and then i will be putting a small amount of JB Weld around the perimeter of the LED housing to secure it. To ensure the LED stays in place while curing I will use ribbon sealer which is very tacky and rigid (puddylike) to keep it in place. I did do a test to see how well one Hyperflux LED would light up the halo and it does at least twice as well at the stock LED (and this is without the extra 3mm led) & looks a whole lot better than the standard yellowish color. Here are some pics of the headlights curing. 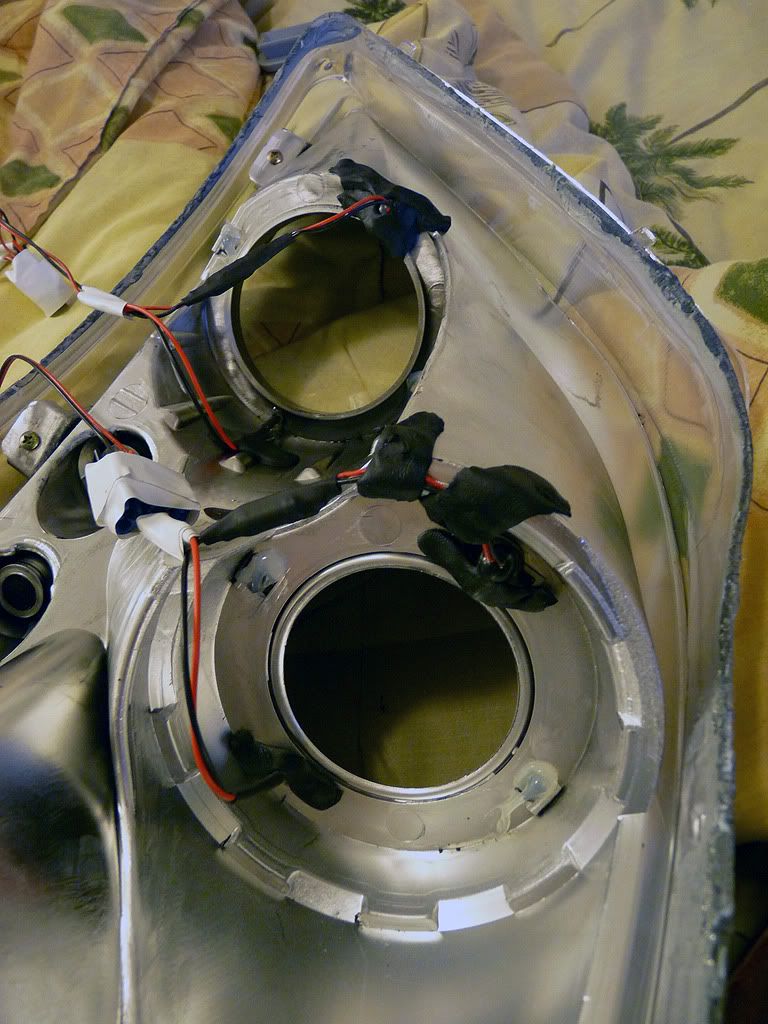 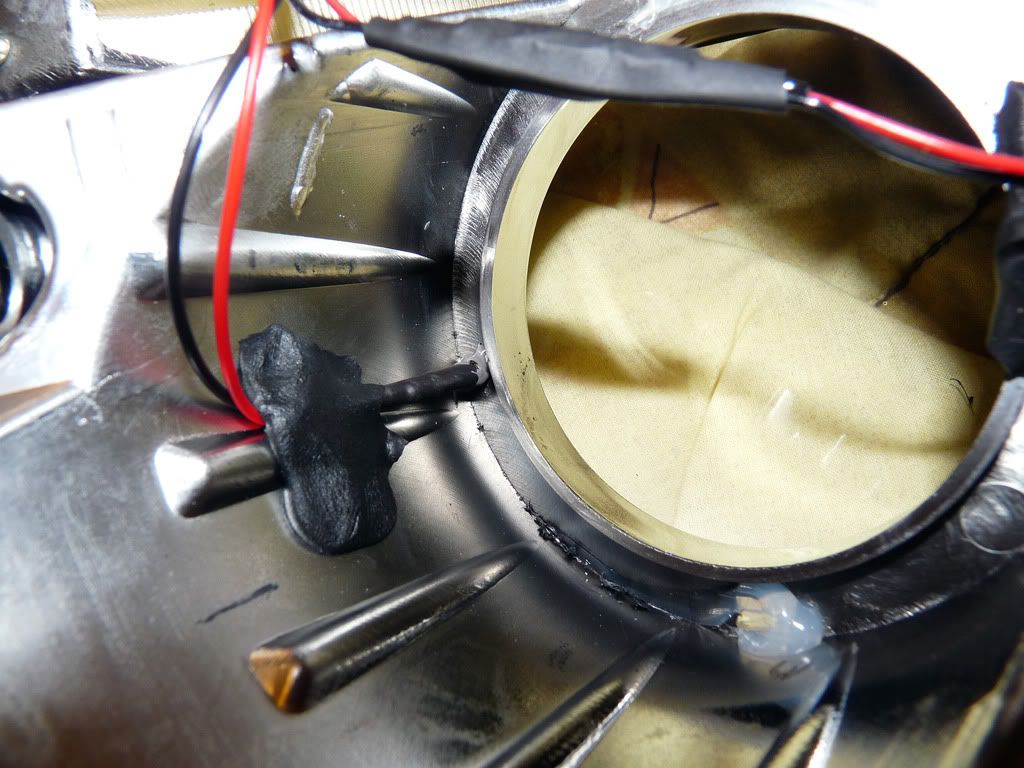  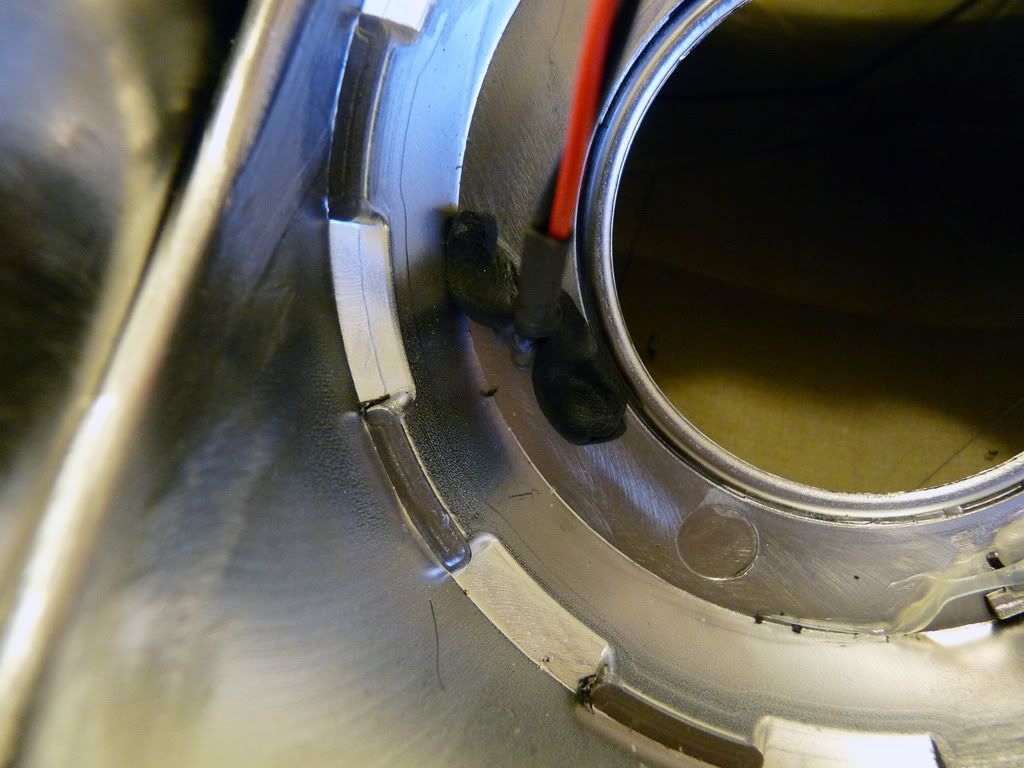 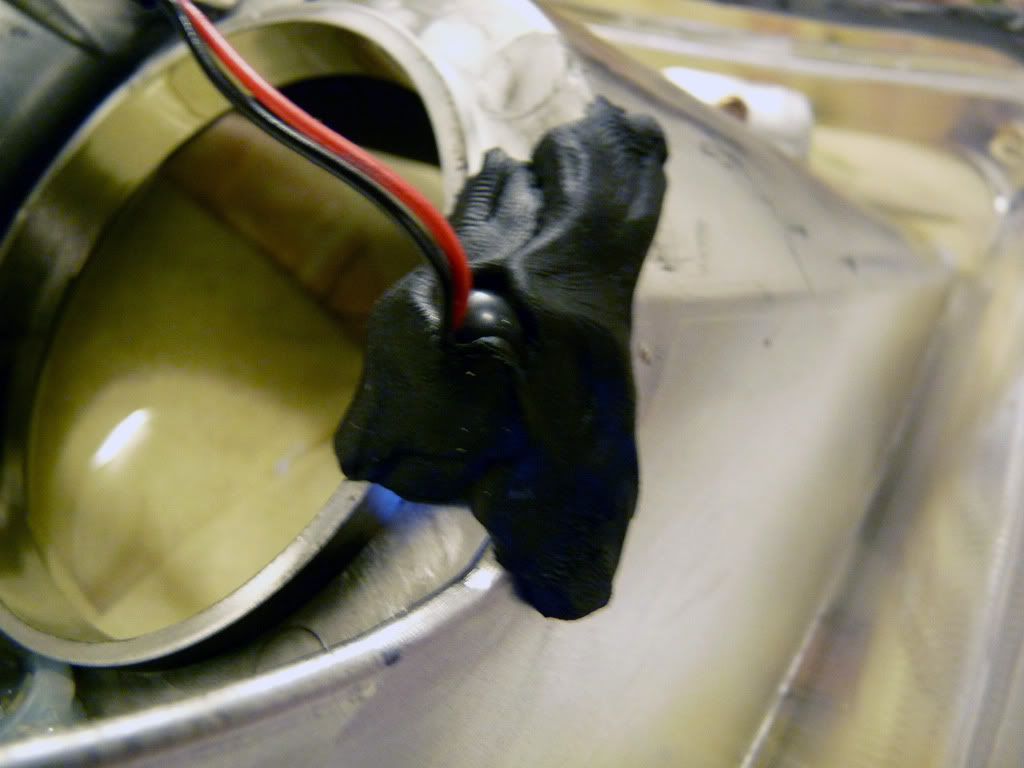 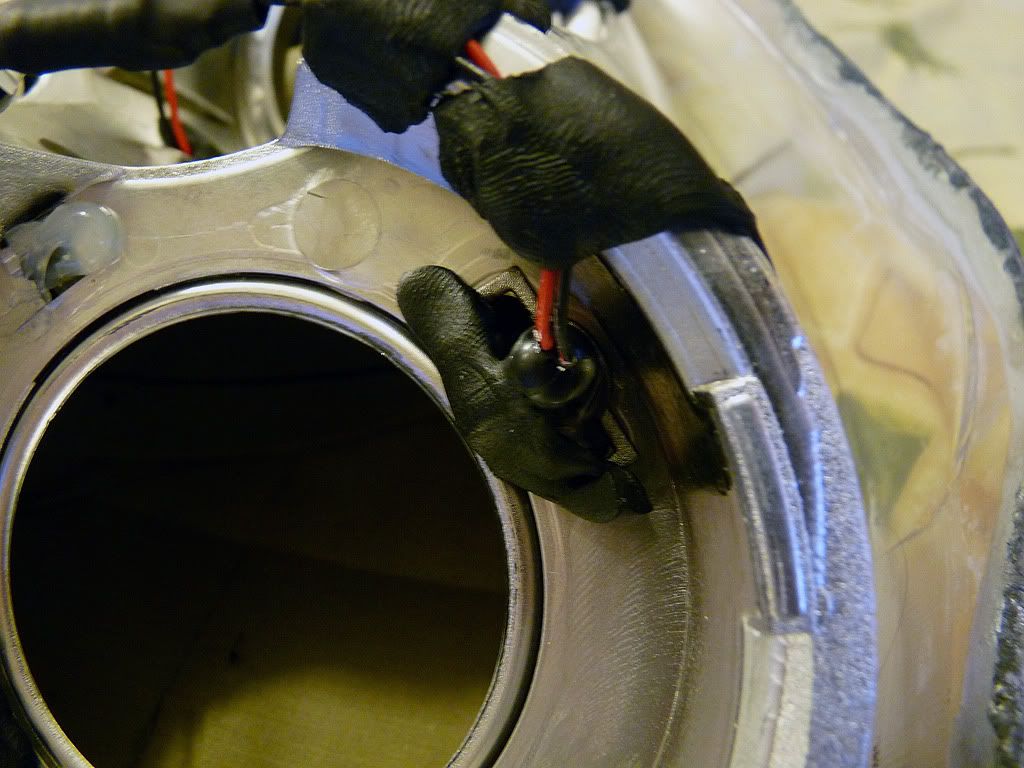
__________________
(3) 12" Alpine Type R Subs/Hifonics BXi1208D Hifonics ZXi6.5c / 2006 Kicker ZX350.4 Knu Fleks 1/0 Wiring & In Big 3 Optima Yellow Top Battery/Iraggi HO Alternator Alpine CDA-105, KCA-420i/KCA-121b/KCE-400BT PG TLD22 8V Line Driver |
|
|
|
|
11-25-2009, 07:22 PM
|
#4 |

|
Cool project. If I personally had the time/patietnce I would rather spend it retrofitting some good projectors into the OEM headlight assembly. Something about the double projector aftermakret headlights just screams rice.
|
|
|
|
|
11-25-2009, 10:25 PM
|
#5 |
|
Give Me Resonance
|
its single projector and the lower one is for high beams though im not using it right now.
__________________
(3) 12" Alpine Type R Subs/Hifonics BXi1208D Hifonics ZXi6.5c / 2006 Kicker ZX350.4 Knu Fleks 1/0 Wiring & In Big 3 Optima Yellow Top Battery/Iraggi HO Alternator Alpine CDA-105, KCA-420i/KCA-121b/KCE-400BT PG TLD22 8V Line Driver |
|
|
|
|
11-25-2009, 11:32 PM
|
#6 |

Drives: Decepticon - Ravage Join Date: Nov 2008
Location: San Francisco
Posts: 1,464
|
awesome, way to turn something from Meh to Yeah! Could you have put in microimages projector?
__________________
 Check out my Build thread: http://www.yarisworld.com/forums/showthread.php?t=52274 |
|
|
|
|
11-25-2009, 11:55 PM
|
#7 | |
|
USAF_SrA_E-4

|
Looking foward for results

__________________
Quote:
|
|
|
|
|
|
11-26-2009, 12:27 AM
|
#8 | |

Drives: 07 Yaris 3dr LB (Bayou Blue) Join Date: Oct 2008
Location: Raleigh, NC
Posts: 2,602
  |
hmmmmmm
excited to see the end result.
__________________
-Jen <3  Quote:

|
|
|
|
|
|
11-26-2009, 09:08 PM
|
#9 |
|
Give Me Resonance
|
Here are some test pictures with the halos lit up at night.
These pictures do proper justice. the blueness wont be for everyone so if you dont agree then cool..leave it at that. 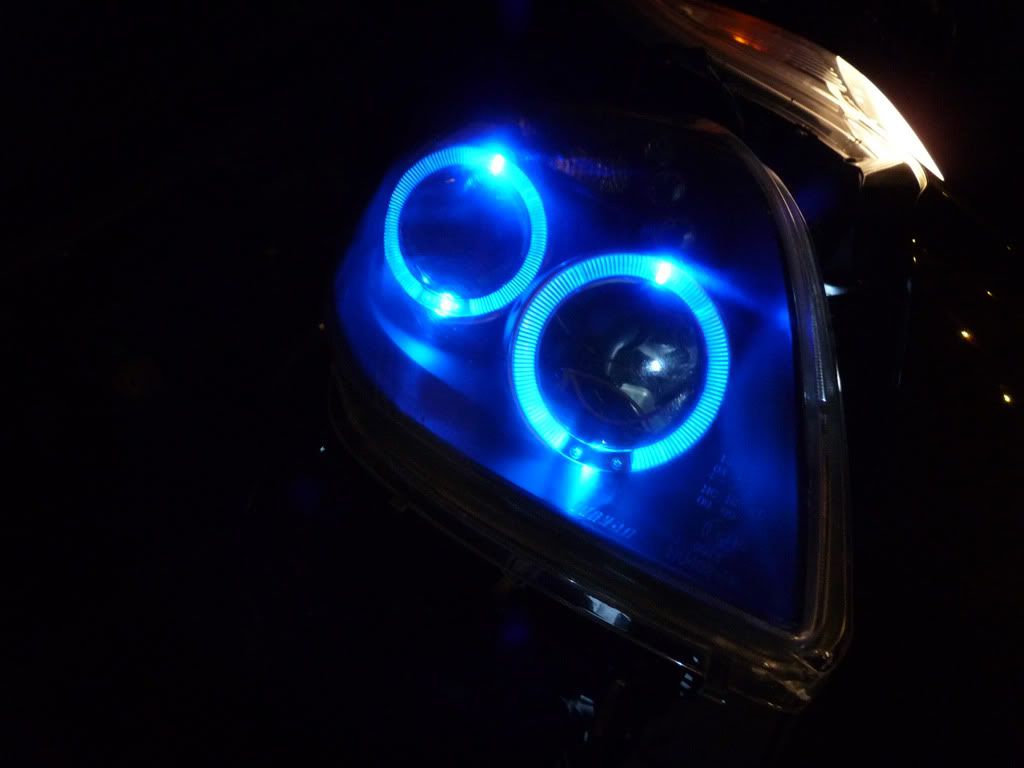 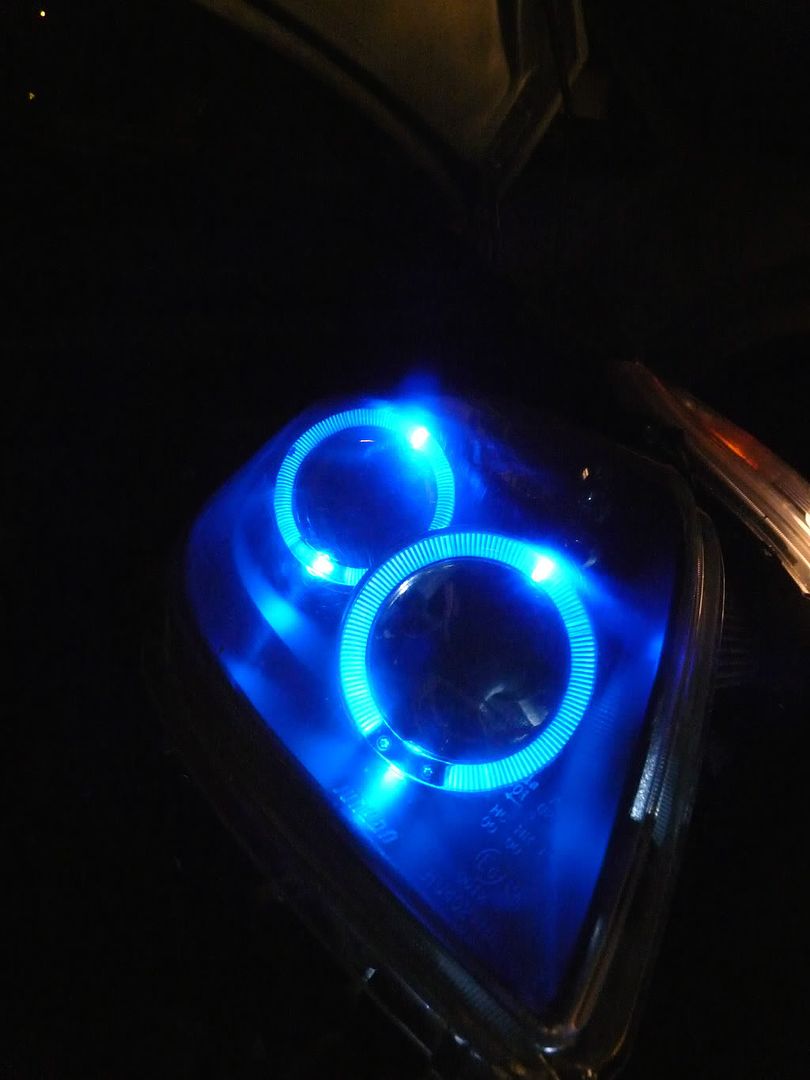 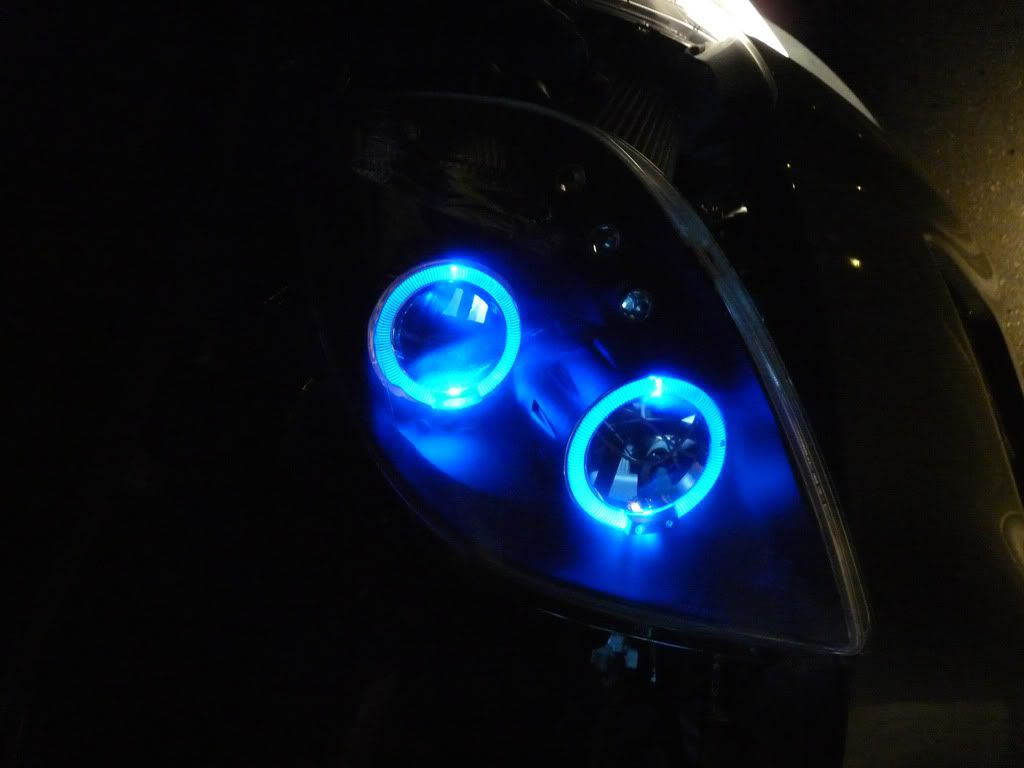
__________________
(3) 12" Alpine Type R Subs/Hifonics BXi1208D Hifonics ZXi6.5c / 2006 Kicker ZX350.4 Knu Fleks 1/0 Wiring & In Big 3 Optima Yellow Top Battery/Iraggi HO Alternator Alpine CDA-105, KCA-420i/KCA-121b/KCE-400BT PG TLD22 8V Line Driver |
|
|
|
|
11-26-2009, 09:28 PM
|
#10 | |
|
Drives: 07 Yaris 3dr LB (Bayou Blue) Join Date: Oct 2008
Location: Raleigh, NC
Posts: 2,602
|
I'd be a little nervous about having BLUE headlights......
__________________
-Jen <3 Quote:
|
|
|
|
|
|
11-26-2009, 10:17 PM
|
#11 |

|
Love it
110% , 
|
|
|
|
|
11-27-2009, 09:47 AM
|
#12 | |
|
toyota

Drives: 2007 Yaris RS Blazed Join Date: Oct 2006
Location: toronto, canada
Posts: 3,637
|
Quote:
|
|
|
|
|
|
11-27-2009, 11:59 AM
|
#13 |
|
Give Me Resonance
|
the actual headlights are of course not blue, theyre cool white or 8000k.
Also the blueness shown in the pictures is quite accurate, maybe from a distance itll appear a little less blue but you get the gist.
__________________
(3) 12" Alpine Type R Subs/Hifonics BXi1208D Hifonics ZXi6.5c / 2006 Kicker ZX350.4 Knu Fleks 1/0 Wiring & In Big 3 Optima Yellow Top Battery/Iraggi HO Alternator Alpine CDA-105, KCA-420i/KCA-121b/KCE-400BT PG TLD22 8V Line Driver |
|
|
|
|
11-27-2009, 12:14 PM
|
#14 |

|
not scared of the popo when running just the halos?
|
|
|
|
|
11-27-2009, 12:22 PM
|
#15 |
|
Give Me Resonance
|
the halos during anything but night time all nearly unable to be seen, i tested the halos during the daytime and they were basically just clear.
For the few times that i am running just halos at dusk ill just be careful i suppose but im not too worried.
__________________
(3) 12" Alpine Type R Subs/Hifonics BXi1208D Hifonics ZXi6.5c / 2006 Kicker ZX350.4 Knu Fleks 1/0 Wiring & In Big 3 Optima Yellow Top Battery/Iraggi HO Alternator Alpine CDA-105, KCA-420i/KCA-121b/KCE-400BT PG TLD22 8V Line Driver |
|
|
|
|
11-27-2009, 01:00 PM
|
#16 |
|
vroom vroom

Drives: lil red 5-door Join Date: Sep 2006
Location: Bangkok, Thailand
Posts: 7,744
 |
awesome progress!!!
I was thinking of doing a similar thing for the halos, but basically making a ring out of equally spaced LEDs, so it would sorta mirror the RS rear lamp design So, thanks for the dismantled pics, giving me ideas again 
__________________
The price of freedom of religion, or of speech, or of the press, is that we must put up with a good deal of rubbish. - Robert Jackson  Bye bye 1NZ... |
|
|
|
|
11-27-2009, 02:07 PM
|
#17 | |
ULTIMATE
Drives: 09 5dr LB, 2x 08 3dr LB Join Date: Oct 2008
Location: USA, CT
Posts: 13,460
|
Quote:
BTW - Nice job with reworking them. |
|
|
|
|
|
11-29-2009, 12:18 AM
|
#18 |
|
Give Me Resonance
|
well the headlights are back together 100% resealed and with the wiring cleaned up like i wanted.
It was sort of annoying getting them back together just as good as they were before but I think I did ok. I sealed the entire perimeter with ribbon sealer as well as every other possible opening and crevice on the underside. All thats left to do is swap them back on the yaris and hope all works like it did in the test. 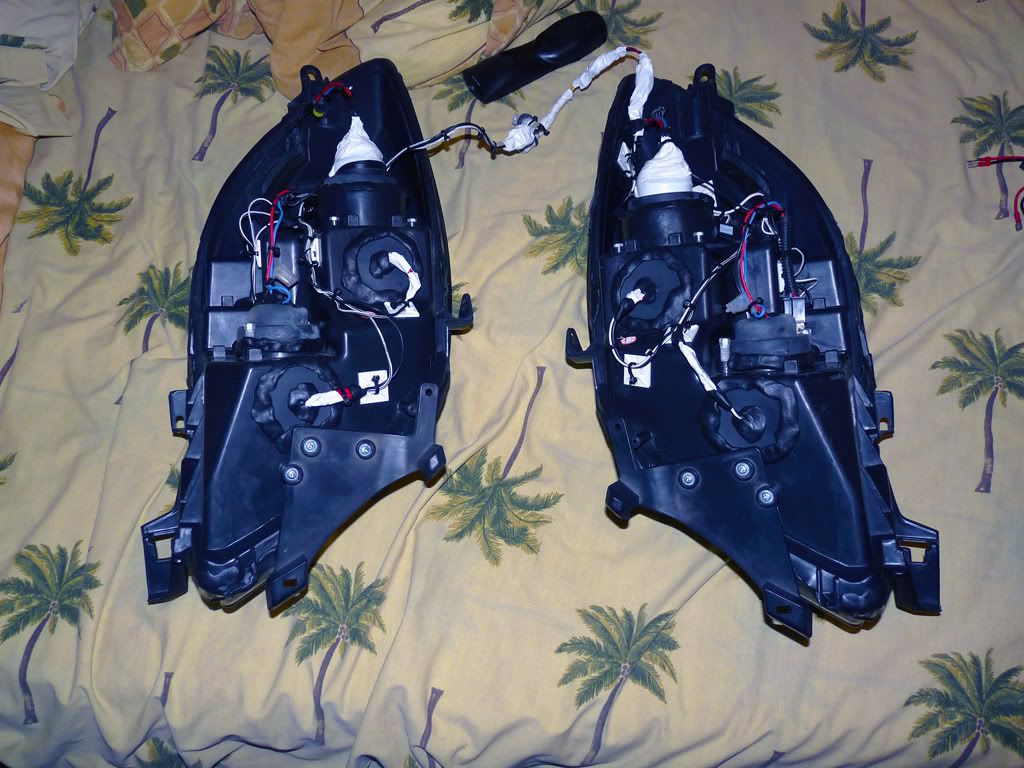 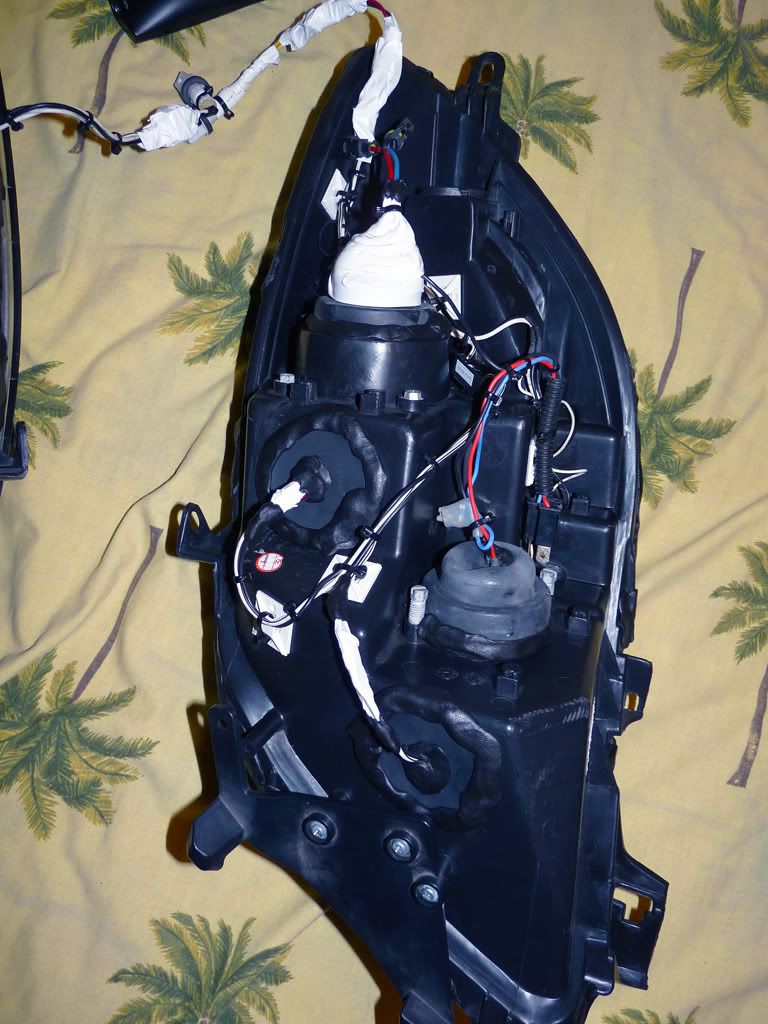 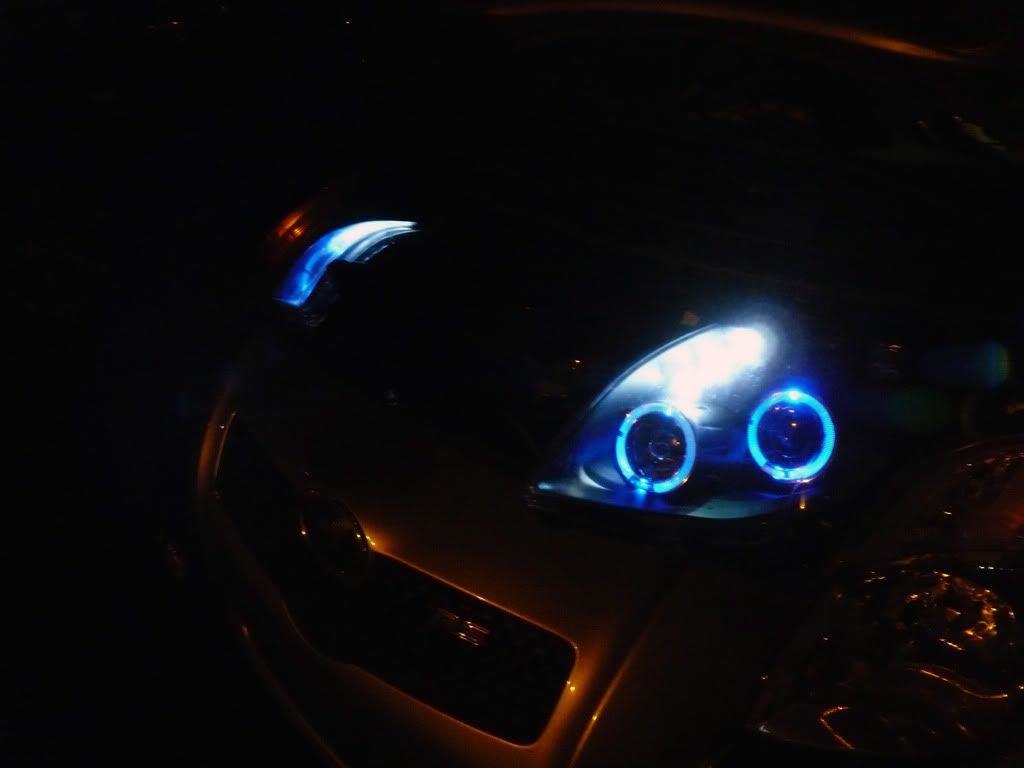 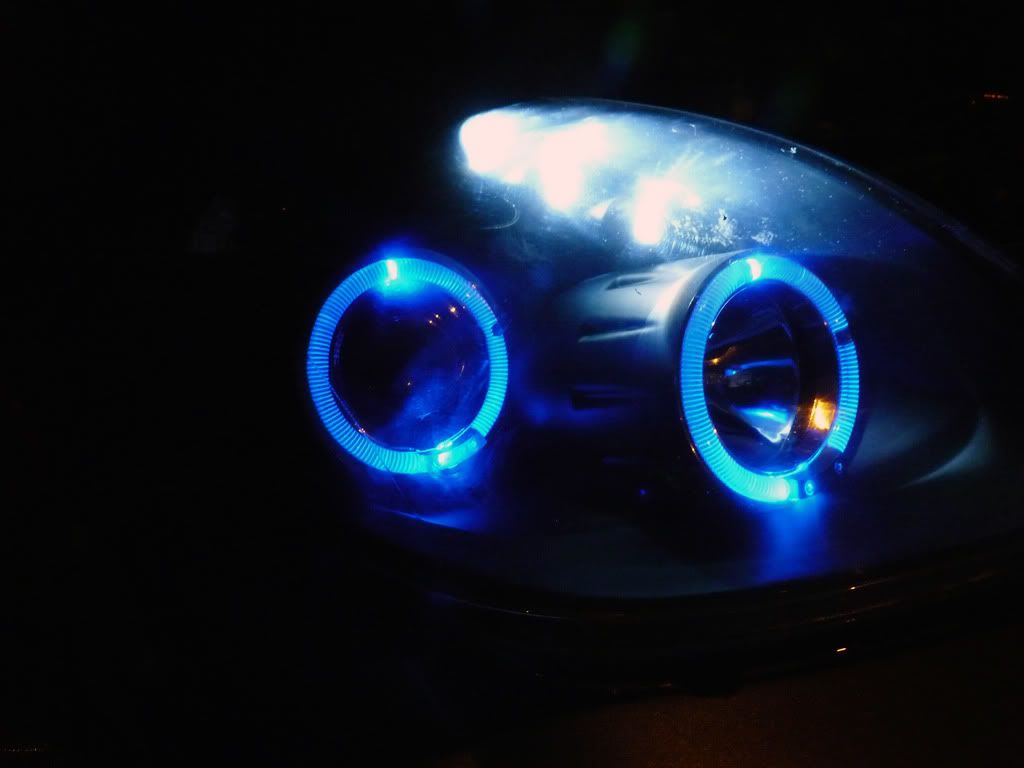
__________________
(3) 12" Alpine Type R Subs/Hifonics BXi1208D Hifonics ZXi6.5c / 2006 Kicker ZX350.4 Knu Fleks 1/0 Wiring & In Big 3 Optima Yellow Top Battery/Iraggi HO Alternator Alpine CDA-105, KCA-420i/KCA-121b/KCE-400BT PG TLD22 8V Line Driver |
|
|
|
 |
|
|
 Similar Threads
|
||||
| Thread | Thread Starter | Forum | Replies | Last Post |
| The "let's brainstorm how to make a piggyback work" thread | eTiMaGo | Forced Induction Forum | 83 | 08-17-2011 03:54 PM |
| MJ dead | 90tsi | Off-topic / Other Cars / Everything else Discussions | 28 | 06-26-2009 02:20 PM |
| Depot Projectors....make an offer | GreenSpeed | Items for Sale by private party | 12 | 04-03-2009 09:16 PM |


 Linear Mode

